
You’ve just gotten your moka pot and you’ve unpacked it. Now you’re probably wondering how to use it for the first time and how to break it in. Don’t worry, it’s not that hard. Here’s how you use your moka pot for the first time.
Using a new moka pot without properly breaking it in will not result in the best coffee. To break in your moka pot;
- Rinse all parts with warm water and scrub with a non-abrasive pad
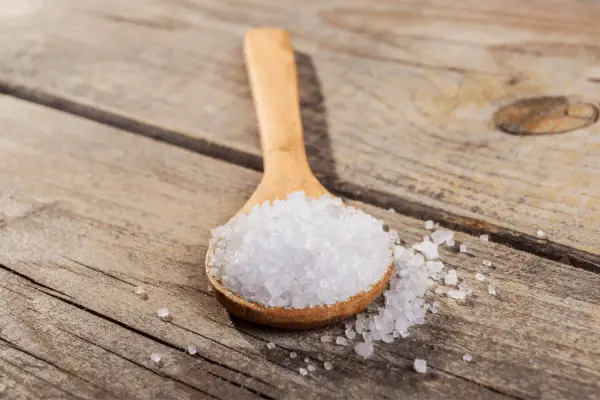
- Boil one pot with water + one tablespoon of salt
- Brew coffee three times and throw it out immediately
If you want a more in-depth explanation of how to properly break in your moka pot, all the steps are laid out below.
Contents
- 1 Steps to break in your new moka pot
- 1.1 1. Unpack your moka pot
- 1.2 2. Wash all parts with warm water
- 1.3 3. Add water and a teaspoon of salt to the vessel but no coffee grounds in the filter
- 1.4 4. Assemble and heat the pot on the stove until all the water is in the top collector:
- 1.5 5. Dump all the water in the sink and rinse all the parts of the coffee maker:
- 1.6 6. Fill the container and use fresh water without salt and fill the filter with coffee:
- 1.7 7. Place the pot on the heat and brew the coffee.
- 1.8 8. Once finished, throw the coffee away
- 1.9 9. Repeat brewing coffee in the same way (step 5-8) one more time
- 1.10 10. Brew the first batch that’s ready to drink.
- 2 Favorite Moka Pot Products
Steps to break in your new moka pot
While it might be attractive to quickly throw in some water and coffee grounds and see what kind of coffee your new moka pot produces. However, if you do that straight after getting it out of the box, you won’t get the best experience. The first cup will likely be a bit metalic and unpleasant. This has a few potential reasons. There might be some metal residue from the manufacturing process or who knows what other leftovers from the factory floor. Also, the aluminum needs a little layer of coffee oils on them so it doesn’t give off any taste.
For those reasons, it’s a good idea to break in your moka pot the right way so your first cup of coffee is something you can enjoy instead of a disappointment. Here’s how you do it;
1. Unpack your moka pot
This shouldn’t need any explanation. Just unpack and pay attention where all the parts go. It’s pretty simple.
Give everything a quick visual check. Are there any cracks, scratches or other quality defects? Scratches or visual defects don’t really impact the usability of the moka pot but depending on what you paid for it, you might want to contact your seller.
If anything is cracked, don’t use the pot and bring it back.
Also check if the thread of the top and bottom parts are in good shape and if they screw together smoothly and tightly.
2. Wash all parts with warm water
Before you do anything else, wash all the parts like you would wash other dishes. There might be some residues and dirt from the manufacturing process you want to get rid of. You also don’t know who handled it and how before you got it so Just wash it. If you’ve got an aluminum model, using soap could tarnish the material so it’s better to just use warm water. If you’ve got a pot made from stainless steel or one that’s finished in another material, using a mild detergent is fine.
Use a non-abrasive pad either way.
3. Add water and a teaspoon of salt to the vessel but no coffee grounds in the filter
Fill the bottom container with fresh water (fill up to just under the pressure valve). Then add a teaspoon of salt to the water. You can mix up the salt and water before heating it although the boiling will dissolve the salt anyways. Don’t use any coffee grounds in the filter yet.
Doing this will get rid of any residues and microorganisms that might be present.
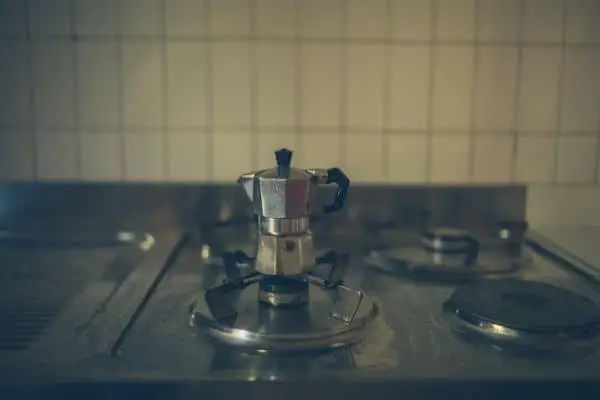
4. Assemble and heat the pot on the stove until all the water is in the top collector:
Once the water and salt are in the boiler, assemble all the parts. Even though you don’t put any coffee in the filter, still use all the parts. Then put the pot on the heat and wait until all the water has boiled from the lower container to the upper collector. By doing this,, the hot salt water will thoroughly clean all the parts of your coffee maker.
There are three main parts to a moka pot:
- Boiler: Bottom part where the water goes
- Filter basket: The little upside down pyramid that sits in the opening of the boiler. This will be filled with coffee grounds later.
- Collector: The top part that screws onto the boiler. Install the filter screen and the gasket into the collector.
Now you have three parts. Fill the boiler with water, drop in the filter basket and screw the collector on. The collector should be quite tight otherwise the pot will leak from the middle.
5. Dump all the water in the sink and rinse all the parts of the coffee maker:
After all the water has collected in the upper chamber, take the pot off the heat and dump everything in the sink.
Be careful, every part will be hot so take care. Use oven gloves or something similar to handle the pot at this time. The handle will be OK to touch with bare hands, any metal part won’t be.
You want to pour out all the salt water and then take apart the moka pot when you can safely handle it. Salt water is quite corrosive so you want to get rid of it quickly. You can easily do this by taking the moka pot apart and rinsing every part liberally with warm water.
6. Fill the container and use fresh water without salt and fill the filter with coffee:
Now it’s time to start brewing the first batch of coffee. Fill the lower container with fresh water again. (Don’t use salt this time). Fill the filter basket with coffee grounds (fill it until the grounds are flush to the top of the basket). We’re going to throw this coffee out after brewing so don’t use your good coffee. If you have a batch of coffee you don’t like or is old, this is a great time to get rid of it without feeling guilty for throwing it away.
This post focuses mostly on breaking in your moka pot. For the exact brew process, click here.
7. Place the pot on the heat and brew the coffee.
Assemble the pot with coffee grounds and water. Just like before, place your stovetop espresso maker on the heat and brew the first batch of coffee in your new moka pot. When you hear sputtering for about 10 seconds, the coffee should be done.
8. Once finished, throw the coffee away
Once the coffee is finished, it might be tempting to try but it’s best to throw it out because it won’t be all that good just yet. This is why you use the coffee grounds you don’t want to use for a good cup since you’re all going to throw it away anyways.
9. Repeat brewing coffee in the same way (step 5-8) one more time
This might seem like a waste of coffee and time but it’s necessary to do this if you want the best tasting coffee from your moka pot. And in the end, it won’t take all that long. It’s a small time investment for better tasting coffee down the road.
Before you start brewing the next batch, clear out the old coffee grounds, quickly rinse everything with fresh water and start over again. To speed up the process, boil water in a kettle and start with hot water in your moka pot. This will speed up the brewing process significantly.
Going through this break in process will get rid of any residues and particles from the manufacturing and handling process. It will also cover most parts in a thin film of coffee oils.
That also means you don’t want to wash the moka pot with any kind of detergent after this (at least the inside). The aluminum most moka pots are made of don’t really like detergent anyways but it will also wash away the natural coffee oils in the pot. This film helps cover the bare metal which helps your coffee from getting a metallic taste.
Could you drink this coffee? Yes, it’ll be safe, just don’t make any judgements based on the results you’re getting here yet. It depends on your specific moka pot, coffee and tastebuds if this will taste good. I personally noticed quite a difference between the first few cup and third one.
10. Brew the first batch that’s ready to drink.
After going through all of this you are finally ready to brew your first batch that’s for drinking. Time to break out the good beans and enjoy!
Are you not yet 100% sure on how to brew good coffee with a moka pot. click here to find a step by step guide.
Favorite Moka Pot Products
You don’t need many things to brew good coffee with a Moka pot. Here are the few things you need to make the best possible coffee.
- Moka Pot: Just buy a high-quality Moka pot from the get-go. The cheaper ones can be messy when brewing. Bialetti is the original and still one of the best with its classic looks. They cost a bit more than the cheap ones but these can last for decades and the parts that wear out are easily available for the Bialetti Moka pots. The 3-cup size is good for a single person (Amazon)
- Beans: Good coffee starts with good beans. You can’t make bad beans taste good. Espresso roast beans are good for a Moka pot and will get you closer to that typical espresso taste. Peet’s Coffee does a great 100$ Arabica espresso roast. Give it a try, you can get it here on Amazon
- Grinder: Using whole beans means you need to grind them at home. This improves the taste because the grounds are much fresher. A Hario Slim (Amazon) is a great starting point for the starting home barista. If you want a good hand grinder for a good price, check out the TimeMore C2 (Amazon)
- Scales: To get consistent results, a set of accurate scales is essential. Check out this Apexstone scale (Amazon). I’ve been using it for more than a year and while it doesn’t look the sleekest, it’s cheap and just as accurate as more expensive coffee scales. It just reacts a little slower.
